Configuring the master interface in the container network namespace
You can create and manage a MAC-VLAN, IP-VLAN, and VLAN subinterface based on a master interface.
About configuring the master interface in the container network namespace
You can create a MAC-VLAN, an IP-VLAN, or a VLAN subinterface that is based on a master interface that exists in a container namespace. You can also create a master interface as part of the pod network configuration in a separate network attachment definition CRD.
To use a container namespace master interface, you must specify true for the linkInContainer parameter that exists in the subinterface configuration of the NetworkAttachmentDefinition CRD.
Creating multiple VLANs on SR-IOV VFs
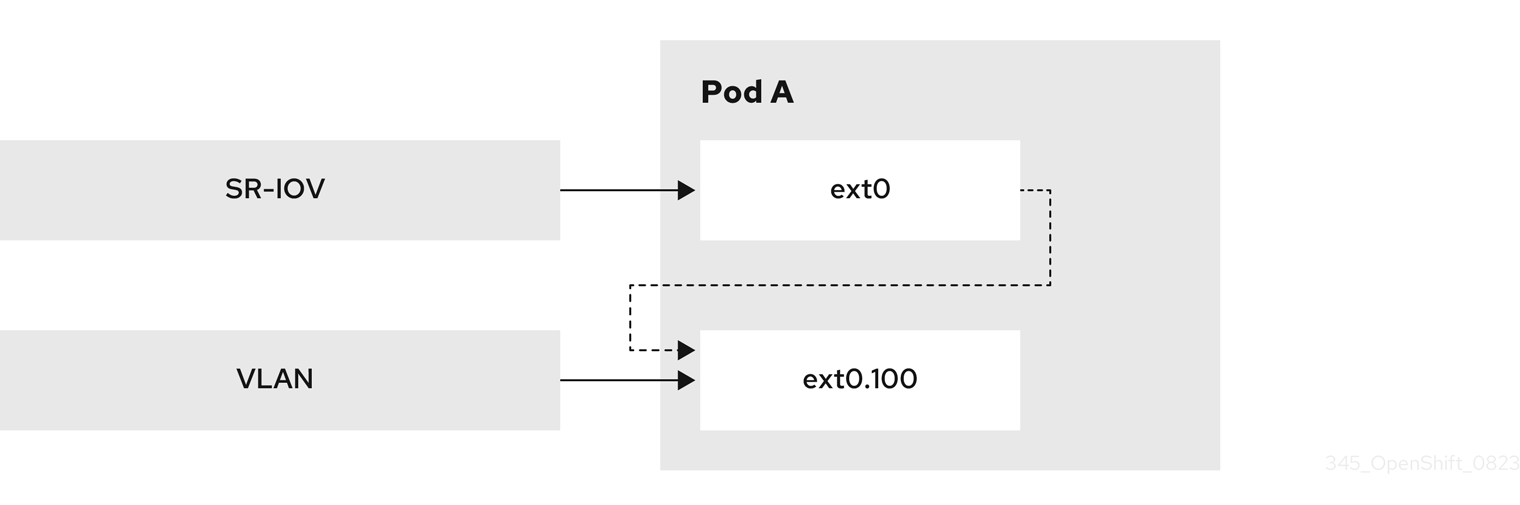
You can create multiple VLANs based on SR-IOV VFs. For this configuration, create an SR-IOV network and then define the network attachments for the VLAN interfaces.
The following diagram shows the setup process for creating multiple VLANs on SR-IOV VFs.
Prerequisites
- You installed the OpenShift CLI (
oc). - You have access to the cluster as a user with the
cluster-adminrole. - You have installed the SR-IOV Network Operator.
Procedure
- Create a dedicated container namespace where you want to deploy your pod by using the following command:terminal
$ oc new-project test-namespace - Create an SR-IOV node policy.
- Create an
SriovNetworkNodePolicyobject, and then save the YAML in thesriov-node-network-policy.yamlfile:yamlapiVersion: sriovnetwork.openshift.io/v1 kind: SriovNetworkNodePolicy metadata: name: sriovnic namespace: openshift-sriov-network-operator spec: deviceType: netdevice isRdma: false needVhostNet: true nicSelector: vendor: "15b3" deviceID: "101b" rootDevices: ["00:05.0"] numVfs: 10 priority: 99 resourceName: sriovnic nodeSelector: feature.node.kubernetes.io/network-sriov.capable: "true"where:
vendorThe vendor hexadecimal code of the SR-IOV network device. The value
15b3associates with a Mellanox NIC.deviceIDThe device hexadecimal code of the SR-IOV network device.
NoteThe SR-IOV network node policy configuration example, with the setting
deviceType: netdevice, is tailored specifically for Mellanox Network Interface Cards (NICs). - Apply the YAML configuration by running the following command:terminal
$ oc apply -f sriov-node-network-policy.yamlNoteApplying the YAML configuration might take time because of a node reboot operation.
- Create an
- Create an SR-IOV network:
- Create the
SriovNetworkcustom resource (CR) for the additional secondary SR-IOV network attachment as demonstrated in the following example CR. Save the YAML as asriov-network-attachment.yamlfile:yamlapiVersion: sriovnetwork.openshift.io/v1 kind: SriovNetwork metadata: name: sriov-network namespace: openshift-sriov-network-operator spec: networkNamespace: test-namespace resourceName: sriovnic spoofChk: "off" trust: "on" - Apply the YAML by running the following command:terminal
$ oc apply -f sriov-network-attachment.yaml
- Create the
- Create the VLAN secondary network.
- Using the following YAML example, create a file named
vlan100-additional-network-configuration.yaml:yamlapiVersion: k8s.cni.cncf.io/v1 kind: NetworkAttachmentDefinition metadata: name: vlan-100 namespace: test-namespace spec: config: | { "cniVersion": "0.4.0", "name": "vlan-100", "plugins": [ { "type": "vlan", "master": "ext0", "mtu": 1500, "vlanId": 100, "linkInContainer": true, "ipam": {"type": "whereabouts", "ipRanges": [{"range": "1.1.1.0/24"}]} } ] }where:
masterThe VLAN configuration needs to specify the
mastername. You can specify the name in the networks annotation of a pod.linkInContainerThe
linkInContainerparameter must be specified.
- Apply the YAML file by running the following command:terminal
$ oc apply -f vlan100-additional-network-configuration.yaml
- Using the following YAML example, create a file named
- Create a pod definition by using the earlier specified networks.
- Using the following YAML configuration example, create a file named
pod-a.yamlfile:NoteThe manifest example includes the following resources:
- Namespace with security labels
- Pod definition with appropriate network annotation
yamlapiVersion: v1 kind: Namespace metadata: name: test-namespace labels: pod-security.kubernetes.io/enforce: privileged pod-security.kubernetes.io/audit: privileged pod-security.kubernetes.io/warn: privileged security.openshift.io/scc.podSecurityLabelSync: "false" --- apiVersion: v1 kind: Pod metadata: name: nginx-pod namespace: test-namespace annotations: k8s.v1.cni.cncf.io/networks: '[ { "name": "sriov-network", "namespace": "test-namespace", "interface": "ext0" }, { "name": "vlan-100", "namespace": "test-namespace", "interface": "ext0.100" } ]' spec: securityContext: runAsNonRoot: true containers: - name: nginx-container image: nginxinc/nginx-unprivileged:latest securityContext: allowPrivilegeEscalation: false capabilities: drop: ["ALL"] ports: - containerPort: 80 seccompProfile: type: "RuntimeDefault"where:
interfaceThe name to be used as the
masterinterface for the VLAN interface.
- Apply the YAML file by running the following command:terminal
$ oc apply -f pod-a.yaml
- Using the following YAML configuration example, create a file named
- Get detailed information about the
nginx-podwithin thetest-namespaceby running the following command:terminal$ oc describe pods nginx-pod -n test-namespaceterminalName: nginx-pod Namespace: test-namespace Priority: 0 Node: worker-1/10.46.186.105 Start Time: Mon, 14 Aug 2023 16:23:13 -0400 Labels: <none> Annotations: k8s.ovn.org/pod-networks: {"default":{"ip_addresses":["10.131.0.26/23"],"mac_address":"0a:58:0a:83:00:1a","gateway_ips":["10.131.0.1"],"routes":[{"dest":"10.128.0.0... k8s.v1.cni.cncf.io/network-status: [{ "name": "ovn-kubernetes", "interface": "eth0", "ips": [ "10.131.0.26" ], "mac": "0a:58:0a:83:00:1a", "default": true, "dns": {} },{ "name": "test-namespace/sriov-network", "interface": "ext0", "mac": "6e:a7:5e:3f:49:1b", "dns": {}, "device-info": { "type": "pci", "version": "1.0.0", "pci": { "pci-address": "0000:d8:00.2" } } },{ "name": "test-namespace/vlan-100", "interface": "ext0.100", "ips": [ "1.1.1.1" ], "mac": "6e:a7:5e:3f:49:1b", "dns": {} }] k8s.v1.cni.cncf.io/networks: [ { "name": "sriov-network", "namespace": "test-namespace", "interface": "ext0" }, { "name": "vlan-100", "namespace": "test-namespace", "i... openshift.io/scc: privileged Status: Running IP: 10.131.0.26 IPs: IP: 10.131.0.26
Creating a subinterface based on a bridge master interface in a container namespace
You can create a subinterface based on a bridge master interface that exists in a container namespace. Creating a subinterface can be applied to other types of interfaces.
Prerequisites
- You have installed the OpenShift CLI (
oc). - You are logged in to the OpenShift Container Platform cluster as a user with
cluster-adminprivileges.
Procedure
- Create a dedicated container namespace where you want to deploy your pod by entering the following command:terminal
$ oc new-project test-namespace - Using the following YAML configuration example, create a bridge
NetworkAttachmentDefinitioncustom resource definition (CRD) file namedbridge-nad.yaml:yamlapiVersion: "k8s.cni.cncf.io/v1" kind: NetworkAttachmentDefinition metadata: name: bridge-network spec: config: '{ "cniVersion": "0.4.0", "name": "bridge-network", "type": "bridge", "bridge": "br-001", "isGateway": true, "ipMasq": true, "hairpinMode": true, "ipam": { "type": "host-local", "subnet": "10.0.0.0/24", "routes": [{"dst": "0.0.0.0/0"}] } }' - Run the following command to apply the
NetworkAttachmentDefinitionCRD to your OpenShift Container Platform cluster:terminal$ oc apply -f bridge-nad.yaml - Verify that you successfully created a
NetworkAttachmentDefinitionCRD by entering the following command. The expected output shows the name of the NAD CRD and the creation age in minutes.terminal$ oc get network-attachment-definitions - Using the following YAML example, create a file named
ipvlan-additional-network-configuration.yamlfor the IPVLAN secondary network configuration:yamlapiVersion: k8s.cni.cncf.io/v1 kind: NetworkAttachmentDefinition metadata: name: ipvlan-net namespace: test-namespace spec: config: '{ "cniVersion": "0.3.1", "name": "ipvlan-net", "type": "ipvlan", "master": "net1", "mode": "l3", "linkInContainer": true, "ipam": {"type": "whereabouts", "ipRanges": [{"range": "10.0.0.0/24"}]} }'where:
masterSpecifies the ethernet interface to associate with the network attachment. The ethernet interface is subsequently configured in the pod networks annotation.
linkInContainerSpecifies that the
masterinterface exists in the container network namespace.
- Apply the YAML file by running the following command:terminal
$ oc apply -f ipvlan-additional-network-configuration.yaml - Verify that the
NetworkAttachmentDefinitionCRD has been created successfully by running the following command. The expected output shows the name of the NAD CRD and the creation age in minutes.terminal$ oc get network-attachment-definitions - Using the following YAML configuration example, create a file named
pod-a.yamlfor the pod definition:yamlapiVersion: v1 kind: Pod metadata: name: pod-a namespace: test-namespace annotations: k8s.v1.cni.cncf.io/networks: '[ { "name": "bridge-network", "interface": "net1" (1) }, { "name": "ipvlan-net", "interface": "net2" } ]' spec: securityContext: runAsNonRoot: true seccompProfile: type: RuntimeDefault containers: - name: test-pod image: quay.io/openshifttest/hello-sdn@sha256:c89445416459e7adea9a5a416b3365ed3d74f2491beb904d61dc8d1eb89a72a4 securityContext: allowPrivilegeEscalation: false capabilities: drop: [ALL]where:
k8s.v1.cni.cncf.io/networks,interfaceSpecifies the name to be used as the
masterfor the IPVLAN interface.
- Apply the YAML file by running the following command:terminal
$ oc apply -f pod-a.yaml
Verification
- Verify that the pod is running by using the following command:terminal
$ oc get pod -n test-namespaceterminalNAME READY STATUS RESTARTS AGE pod-a 1/1 Running 0 2m36s - Show network interface information about the
pod-aresource within thetest-namespaceby running the following command:terminal$ oc exec -n test-namespace pod-a -- ip aterminal1: lo: <LOOPBACK,UP,LOWER_UP> mtu 65536 qdisc noqueue state UNKNOWN group default qlen 1000 link/loopback 00:00:00:00:00:00 brd 00:00:00:00:00:00 inet 127.0.0.1/8 scope host lo valid_lft forever preferred_lft forever inet6 ::1/128 scope host valid_lft forever preferred_lft forever 3: eth0@if105: <BROADCAST,MULTICAST,UP,LOWER_UP> mtu 1400 qdisc noqueue state UP group default link/ether 0a:58:0a:d9:00:5d brd ff:ff:ff:ff:ff:ff link-netnsid 0 inet 10.217.0.93/23 brd 10.217.1.255 scope global eth0 valid_lft forever preferred_lft forever inet6 fe80::488b:91ff:fe84:a94b/64 scope link valid_lft forever preferred_lft forever 4: net1@if107: <BROADCAST,MULTICAST,UP,LOWER_UP> mtu 1500 qdisc noqueue state UP group default link/ether be:da:bd:7e:f4:37 brd ff:ff:ff:ff:ff:ff link-netnsid 0 inet 10.0.0.2/24 brd 10.0.0.255 scope global net1 valid_lft forever preferred_lft forever inet6 fe80::bcda:bdff:fe7e:f437/64 scope link valid_lft forever preferred_lft forever 5: net2@net1: <BROADCAST,MULTICAST,NOARP,UP,LOWER_UP> mtu 1500 qdisc noqueue state UNKNOWN group default link/ether be:da:bd:7e:f4:37 brd ff:ff:ff:ff:ff:ff inet 10.0.0.1/24 brd 10.0.0.255 scope global net2 valid_lft forever preferred_lft forever inet6 fe80::beda:bd00:17e:f437/64 scope link valid_lft forever preferred_lft foreverThis output shows that the network interface
net2associates with the physical interfacenet1.