Use virtual machine file restore
Discover VM backups, restore files, and access restored files through a web browser or SSH-based tools.
Enable OADP VMFR
Enable OADP virtual machine file restore (VMFR) by configuring the DataProtectionApplication (DPA) custom resource (CR) with the vmFileRestore section. You can allow file-level restore operations for VM backups.
Prerequisites
- You are logged in to the cluster with the
cluster-adminrole. - The OADP Operator is installed.
- The
DataProtectionApplication(DPA) CR is configured. - OpenShift Virtualization is installed and running on the cluster.
- You have a default storage class configured on the cluster.
Procedure
-
Edit the
DataProtectionApplicationCR to enable the VMFR feature:apiVersion: oadp.openshift.io/v1alpha1 kind: DataProtectionApplication metadata: name: oadp-backup namespace: openshift-adp spec: configuration: nodeAgent: enable: true uploaderType: kopia velero: defaultPlugins: - kubevirt - csi - openshift - aws disableFsBackup: false vmFileRestore: enable: true backupLocations: - velero: config: profile: "default" region: <region> provider: aws default: true credential: key: cloud name: <cloud_credentials> objectStorage: bucket: <bucket_name> prefix: velerowhere:
kubevirt- Specifies the
kubevirtVelero plugin in thedefaultPluginslist. This plugin is required for VM backup and file-level restore operations. vmFileRestore- Specifies the section in the DPA
specto enable the VMFR feature. enable- Specifies whether to enable the VMFR feature. Set to
trueto enable the feature.
-
Apply the DPA configuration by running the following command:
Replace
<dpa_cr_filename>with the file name containing the DPA CR configuration.
Verification
-
To verify that the DPA is reconciled with the VMFR feature enabled, run the following command:
In the output, verify that the
status.conditionssection includes a condition withtype: VMFileRestoreReadyandstatus: "True". -
To verify that the
oadp-vm-file-restore-controller-managerpod is running, run the following command:The output should include a running
oadp-vm-file-restore-controller-managerpod.
Create a VirtualMachineBackupsDiscovery CR
Create a VirtualMachineBackupsDiscovery (VMBD) custom resource (CR) to identify which Velero backups contain a specified virtual machine (VM). You can locate available backups before performing a file-level restore.
After you create a VMBD CR, the CR undergoes the following phases:
- The initial phase for the CR is
New. - The controller compiles candidate backups and verifies VM presence in each backup.
- Upon successful discovery, the
status.phasefield of the VMBD CR is updated toCompleted.
Warning
Create all VMFR custom resources in the protected namespace, which is openshift-adp by default.
Prerequisites
- You are logged in to the cluster with the
cluster-adminrole. - You have installed the OADP Operator.
- You have configured the
DataProtectionApplication(DPA) CR with the VMFR feature enabled. - You have existing Velero backups that contain virtual machine data.
Procedure
-
Create a
VirtualMachineBackupsDiscoveryCR YAML manifest file with the following configuration:apiVersion: oadp.openshift.io/v1alpha1 kind: VirtualMachineBackupsDiscovery metadata: name: find-my-vm-backups namespace: openshift-adp spec: virtualMachineName: "production-web-server" virtualMachineNamespace: "production"where:
name- Specifies a name for the VMBD CR. For example,
find-my-vm-backups. namespace- Specifies the namespace where the VMBD CR is created. This must be the OADP protected namespace, typically
openshift-adp. virtualMachineName- Specifies the name of the virtual machine to search for in backups. For example,
production-web-server. virtualMachineNamespace- Specifies the namespace of the target virtual machine. For example,
production.
-
Optional: To filter backups by a time range, add
startTimeandendTimefields to thespecsection:apiVersion: oadp.openshift.io/v1alpha1 kind: VirtualMachineBackupsDiscovery metadata: name: find-my-vm-backups namespace: openshift-adp spec: virtualMachineName: "production-web-server" virtualMachineNamespace: "production" startTime: "2025-08-01" endTime: "2025-09-01"where:
startTime- Specifies the start of the time range to filter backups. Backups created before this date are excluded.
endTime- Specifies the end of the time range to filter backups. Backups created after this date are excluded.
-
Optional: To discover specific backups by name, add the
requestedBackupsfield to thespecsection:apiVersion: oadp.openshift.io/v1alpha1 kind: VirtualMachineBackupsDiscovery metadata: name: find-my-vm-backups namespace: openshift-adp spec: virtualMachineName: "production-web-server" virtualMachineNamespace: "production" requestedBackups: - "initial-backup-from-2024-01-01" - "last-working-from-2025-07-28"where:
requestedBackups- Specifies a list of backup names to include in the discovery. These backups are included regardless of any time range filter.
-
To apply the VMBD CR configuration, run the following command:
Replace
<vmbd_cr_filename>with the file name containing the VMBD CR configuration.
Verification
-
To verify that the VMBD CR is successfully created and discovery is complete, run the following command:
apiVersion: oadp.openshift.io/v1alpha1 kind: VirtualMachineBackupsDiscovery metadata: name: find-my-vm-backups namespace: openshift-adp spec: virtualMachineName: "production-web-server" virtualMachineNamespace: "production" status: phase: Completed validBackups: - name: "backup-2025-09-20" namespace: openshift-adp createdAt: "2025-09-20T02:00:00Z" - name: "backup-2025-09-15" namespace: openshift-adp createdAt: "2025-09-15T02:00:00Z" backupDiscoveryProgress: - name: "backup-2025-09-20" namespace: openshift-adp status: Completed message: "VM found in backup" createdAt: "2025-09-20T02:00:00Z" - name: "backup-2025-09-15" namespace: openshift-adp status: Completed message: "VM found in backup" createdAt: "2025-09-15T02:00:00Z" conditions: - type: Ready status: "True" message: "Successfully discovered 2 valid backups" reason: DiscoverySuccessful discoveryStats: totalCandidates: 2 completed: 2 failed: 0 inProgress: 0 pending: 0 skipped: 0 observedGeneration: 1where:
phase: Completed- Specifies that the discovery process is complete.
validBackups- Specifies the list of backups that contain the specified virtual machine. Each entry includes the
name,namespace, andcreatedAttimestamp. backupDiscoveryProgress- Specifies the discovery progress for each candidate backup, including the
statusandmessage. discoveryStats- Specifies the total number of candidate backups processed and the count of completed, failed, in-progress, pending, and skipped results.
observedGeneration- Specifies the last generation value processed by the controller.
Create a VirtualMachineFileRestore CR
Create a VirtualMachineFileRestore (VMFR) custom resource (CR) to make files from discovered virtual machine (VM) backups accessible for browsing and downloading. You can recover individual files without restoring the entire VM.
After you create a VMFR CR, the CR undergoes the following phases:
- The initial phase for the CR is
New. - The controller validates the referenced discovery, restores PVCs, and creates file-serving resources.
- Upon successful setup, the
status.phasefield of the VMFR CR is updated toCompleted.
Note
All VMFR custom resources must be created in the protected namespace, which is openshift-adp by default.
Prerequisites
- You are logged in to the cluster with the
cluster-adminrole. - You have installed the OADP Operator.
- You have configured the
DataProtectionApplication(DPA) CR with the VMFR feature enabled. - You have created a
VirtualMachineBackupsDiscovery(VMBD) CR and itsstatus.phaseisCompleted.
Procedure
-
[Optional] Create a secret containing the credentials for accessing the file browser:
If you do not create a secret, the VMFR controller creates a secret for you and references it in the VMFR CR.
apiVersion: v1
kind: Secret
metadata:
  name: vmfr-credentials
  namespace: openshift-adp
type: Opaque
data:
  password: <base64_encoded_password>
  username: <base64_encoded_username>
where:
password- Specifies the base64-encoded password for the file browser. The password must be at least 12 characters long before encoding.
username- Specifies the base64-encoded username for the file browser.
-
Create a
VirtualMachineFileRestoreCR YAML manifest file with the following configuration.To configure file browser access:
apiVersion: oadp.openshift.io/v1alpha1
kind: VirtualMachineFileRestore
metadata:
  name: restore-config-files
  namespace: openshift-adp
spec:
  backupsDiscoveryRef: find-my-vm-backups
  selectedBackups:
    - backup-2025-09-20
    - backup-2025-09-15
  fileAccess:
    fileBrowser:
      credentialsSecretRef:
        name: vmfr-credentials
      exposeExternally: true
To configure SSH access:
apiVersion: oadp.openshift.io/v1alpha1
kind: VirtualMachineFileRestore
metadata:
  name: restore-config-files
  namespace: openshift-adp
spec:
  backupsDiscoveryRef: find-my-vm-backups
  selectedBackups:
    - backup-2025-09-20
    - backup-2025-09-15
  fileAccess:
    ssh: {}
where:
name- Specifies a name for the VMFR CR. For example,
restore-config-files. namespace- Specifies the namespace where the VMFR CR is created. This must be the OADP protected namespace, typically
openshift-adp. backupsDiscoveryRef- Specifies the name of the VMBD CR that contains the discovery results. This VMBD CR must be in the
Completedphase. selectedBackups- Specifies a list of backup names from the VMBD valid results to restore. A Velero restore operation is created for each backup in this list.
fileAccess- Specifies the configuration for accessing the restored files.
fileBrowser- Specifies the file browser configuration for web-based access.
credentialsSecretRef- Specifies the name of the Kubernetes secret that contains the credentials for file browser access.
exposeExternally- Specifies whether to create an external route for accessing the file browser. Set to
trueto create a publicly accessible route. ssh- Specifies the SSH access configuration. Set to
{}to enable SSH access with autogenerated credentials. The controller generates an SSH key pair and stores it in a Kubernetes secret. Optionally, you can also specify ausername, andpublickeyfor enabling the SSH access as shown in the following example:
-
To apply the VMFR CR configuration, run the following command:
Replace
<vmfr_cr_filename>with the file name containing the VMFR CR configuration.
Verification
-
To verify that the VMFR CR is successfully created and file access is available, run the following command:
apiVersion: oadp.openshift.io/v1alpha1
kind: VirtualMachineFileRestore
metadata:
  name: restore-config-files
  namespace: openshift-adp
spec:
  backupsDiscoveryRef: find-my-vm-backups
  selectedBackups:
    - backup-2025-09-20
    - backup-2025-09-15
  fileAccess:
    fileBrowser:
      credentialsSecretRef:
        name: vmfr-credentials
      exposeExternally: true
status:
  phase: Completed
  fileServingInfo:
    fileBrowser:
      clusterAccess: https://restore-config-files-fileserver-svc.production-production-web-server-a1b2c3.svc.cluster.local:8443
      publicAccess: https://restore-config-files.vmfr.apps.example.com
      credentialsSecretRef:
        name: restore-config-files-filebrowser-xk4wm
        namespace: production-production-web-server-a1b2c3
  conditions:
    - type: Ready
      status: "True"
      message: "File restore completed, files accessible via file server and external route"
      reason: Completed
    - type: Available
      status: "True"
      message: "File server is accessible and serving files"
      reason: FileServerAvailable
  pvcRestores:
    - pvcName: production-web-server-dv
      pvcNamespace: production
      pvcUID: 05ac1521-2a16-4a71-b81f-ccad592b89cd
      restores:
        - veleroBackupName: backup-2025-09-20
          veleroBackupNamespace: openshift-adp
          veleroRestoreName: vmfr-restore-config-files-backup-2025-09-20-89lfl
          veleroRestoreNamespace: openshift-adp
          phase: Completed
          state: available
          timestamp: "2025-09-20T02:00:00Z"
        - veleroBackupName: backup-2025-09-15
          veleroBackupNamespace: openshift-adp
          veleroRestoreName: vmfr-restore-config-files-backup-2025-09-15-bfqx4
          veleroRestoreNamespace: openshift-adp
          phase: Completed
          state: available
          timestamp: "2025-09-15T02:00:00Z"
      size: 150Mi
  createdNamespace: production-production-web-server-a1b2c3
  observedGeneration: 1
where:
phase: Completed- Specifies that the file restore process is complete and file-serving endpoints are available.
fileServingInfo.fileBrowser- Specifies the endpoint details and credentials for accessing the restored files through the file browser.
clusterAccess- Specifies the cluster-internal URL for accessing the file browser.
publicAccess- Specifies the externally accessible URL for the file browser. This field is present only when
exposeExternallyis set totrue. credentialsSecretRef- Specifies the Kubernetes secret that contains the generated credentials for accessing the file browser interface, including the
nameandnamespaceof the secret. pvcRestores- Specifies the restore status grouped by PVC. Each PVC entry includes the
pvcName,pvcNamespace,pvcUID, and arestoreslist with details for each backup restore. state- Specifies the state of the restored PVC. Possible values include
available,processing,failed,backup-deleted,backup-missing,unsupported-plugin, andextraction-failed. createdNamespace- Specifies the temporary namespace created for hosting the file-serving resources. This namespace is cleaned up when you delete the VMFR CR.
Access restored files through a web browser
Access restored virtual machine (VM) files through a web browser by using the file browser interface provided by the VirtualMachineFileRestore (VMFR) custom resource (CR). You can browse, preview, and download files from VM backups.
Prerequisites
- You are logged in to the cluster with the
cluster-adminrole. - A
VirtualMachineFileRestore(VMFR) CR with thefileAccess.fileBrowsersection configured exists. - The VMFR CR
status.phaseisCompleted.
Procedure
-
To retrieve the file browser access URLs, run the following command:
Replace
<vmfr_cr_name>with the name of the VMFR CR. The output includes theclusterAccessURL for cluster-internal access and thepublicAccessURL ifexposeExternallyis set totrue. -
If the VMFR CR has
exposeExternallyset totrue, open a web browser and navigate to thepublicAccessURL from the status output.If
exposeExternallyis not enabled, set up port forwarding to the file-serving service by running the following command:Replace
<vmfr_cr_name>with the name of the VMFR CR and<restore_namespace>with the namespace from thestatus.createdNamespacefield. Then navigate tohttps://localhost:8443in your web browser. -
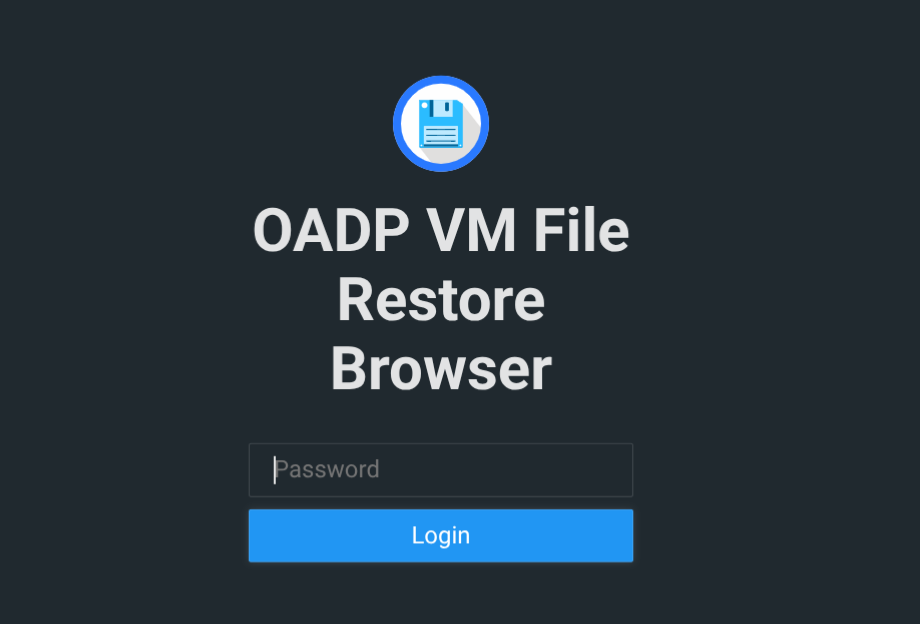
Log in by using the credentials from the secret you created for file browser access.
Figure 1. OADP VM File Restore Browser login page
-
Browse the files organized by date, backup name, and PVC name.
Figure 2. File browser listing showing backup contents

-
View the file content by selecting the file. To download a file, select the file and click Download. To download a directory as an archive, select the directory and click Download.
Figure 3. File preview in the file browser

Access restored files through SSH
Access restored virtual machine (VM) files through SSH by using rsync, scp, or sftp with the VirtualMachineFileRestore (VMFR) custom resource (CR). You can transfer files from VM backups efficiently.
When you configure SSH access, the VMFR controller autogenerates an SSH key pair and stores it in a Kubernetes secret. The default SSH username is oadp. The SSH file server listens on port 2222.
The remote path for restored files follows the format /restores/<date>/<backup_name>/<vm_name>/<path_to_file>.
Prerequisites
- You are logged in to the cluster with the
cluster-adminrole. - You have created a
VirtualMachineFileRestore(VMFR) CR with thefileAccess.sshsection configured. - The VMFR CR
status.phaseisCompleted.
Procedure
-
To retrieve the SSH access information, run the following command:
Replace
<vmfr_cr_name>with the name of the VMFR CR. The output includes theclusterAccessURL andcredentialsSecretRefcontaining the name and namespace of the generated SSH key secret. -
Retrieve the private key from the generated secret and save it to a file:
$ oc get secret <secret_name> -n <secret_namespace> -o jsonpath='{.data.privateKey}' | base64 -d > id-rsaReplace
<secret_name>and<secret_namespace>with the values from thestatus.fileServingInfo.ssh.credentialsSecretReffield. -
Set the correct permissions on the private key file:
-
Get the name of the file server service created in the VMFR namespace:
Replace
<created_namespace>with the value from thestatus.createdNamespacefield of the VMFR CR. -
To copy a file from the backup by using
scp, run the following command:$ scp -P 2222 -i id-rsa \ -o StrictHostKeyChecking=no \ -o UserKnownHostsFile=/dev/null \ oadp@<fileserver_svc>.<created_namespace>.svc.cluster.local:<remote_path> \ <local_destination>where:
<fileserver_svc>- Specifies the name of the file server service.
<created_namespace>- Specifies the namespace from the
status.createdNamespacefield. <remote_path>- Specifies the path to the file in the format
/restores/<date>/<backup_name>/<vm_name>/<path_to_file>. <local_destination>- Specifies the local file path to save the restored file.
-
To start an interactive SFTP session, run the following command:
Delete a VirtualMachineFileRestore CR
Delete a VirtualMachineFileRestore (VMFR) custom resource (CR) to clean up file-serving resources after you have recovered the files you need. This helps you free cluster resources used by the file-serving pod and temporary namespace.
When you delete a VMFR CR, the controller performs the following cleanup operations:
- Stops the file-serving pod and associated services.
- Deletes the restored PVCs.
- Deletes the temporary namespace if one was automatically created.
Prerequisites
- You are logged in to the cluster with the
cluster-adminrole. - You have a
VirtualMachineFileRestoreCR that you want to delete.
Procedure
-
To delete a
VirtualMachineFileRestoreCR, run the following command:Replace
<vmfr_cr_name>with the name of the VMFR CR.
Verification
-
To verify that the VMFR CR is deleted and resources are cleaned up, run the following command:
The deleted VMFR CR should not appear in the output.
Test the VM file restore workflow
Complete an end-to-end workflow that creates a VM, backs it up, and restores individual files through SSH to test the VM file restore feature or verify your configuration.
Prerequisites
- You are logged in to the cluster with the
cluster-adminrole. - You have installed the OADP Operator.
- OpenShift Virtualization is installed and running on the cluster.
- You have installed the
virtctlCLI tool to access the VM.
Procedure
-
Create a secret for the cloud storage credentials by running the following command:
where:
<secret_name>- Specifies the name of the cloud credentials secret.
<credentials_file_path>- Specifies the path to the file that contains the cloud storage credentials.
-
Create a
DataProtectionApplication(DPA) CR with the VMFR feature enabled and thekubevirtplugin:apiVersion: oadp.openshift.io/v1alpha1 kind: DataProtectionApplication metadata: name: vmfr-dpa namespace: openshift-adp spec: backupLocations: - velero: credential: key: cloud name: <secret_name> default: true objectStorage: bucket: <bucket_name> prefix: velero provider: <provider> configuration: velero: defaultPlugins: - csi - openshift - kubevirt - <provider> disableFsBackup: false nodeAgent: enable: true uploaderType: kopia vmFileRestore: enable: truewhere:
<secret_name>- Specifies the name of the cloud credentials secret you created.
<bucket_name>- Specifies the name of the object storage bucket.
<provider>- Specifies the cloud provider plugin, such as
aws,gcp, orazure. vmFileRestore- Enables the VMFR feature by setting the
enablefield totrue.
-
Apply the DPA configuration by running the following command:
-
Verify that the DPA is reconciled and the VMFR feature is enabled by running the following command:
In the output, verify that the
status.conditionssection includes a condition withtype: VMFileRestoreReadyandstatus: "True". -
Verify that the
velero,nodeAgent, andoadp-vm-file-restore-controller-managerpods are running by running the following command: -
Generate an SSH key pair for accessing the VM:
Replace
<vm_key_name>with a name for the SSH folder and the key file. -
Create a namespace for the VM by running the following command:
-
Create a Kubernetes secret with the SSH public key in the VM namespace:
$ oc create secret generic <ssh_secret_name> \
  --from-file=key=<path_to_public_key> \
  -n <vm_namespace>
where:
<ssh_secret_name>- Specifies the name of the secret that contains the SSH public key.
<path_to_public_key>- Specifies the path to the SSH public key file you created in an earlier step. For example,
$HOME/.ssh/vm-key.pub. <vm_namespace>- Specifies the namespace for the VM.
-
Create a
VirtualMachineCR by using the built-in VM templatefedora-server-small:where:
<vm_name>- Specifies the name of the VM.
<vm_namespace>- Specifies the namespace for the VM.
-
Wait for the VM to be ready:
-
Patch the VM configuration
accessCredentialsobject with the SSH public key:$ oc patch vm <vm_name> -n <vm_namespace> --type=merge -p '{"spec":{"template":{"spec":{"accessCredentials":[{"sshPublicKey":{"propagationMethod":{"noCloud":{}},"source":{"secret":{"secretName":"<ssh_secret_name>"}}}}]}}}}'where:
<vm_name>- Specifies the name of the VM.
<vm_namespace>- Specifies the namespace for the VM.
<ssh_secret_name>- Specifies the name of the secret that contains the SSH public key.
-
SSH to the VM and create a test file:
$ virtctl ssh <vm_user>@vmi/<vm_name> \
  -n <vm_namespace> \
  --identity-file=$HOME/.ssh/<vm_key_name> \
  --local-ssh-opts="-o StrictHostKeyChecking=no" \
  -c "echo 'Test file for VMFR validation - $(date)' > /home/fedora/test-vmfr-file.txt"
where:
<vm_user>- Specifies the name of the VM user. For the in-built VM template, the user name is
fedora.
-
Create a
BackupCR to back up the VM namespace: -
Apply the
BackupCR by running the following command: -
Verify that the backup is complete by running the following command:
The output should display
Completed. -
Create a
VirtualMachineBackupsDiscoveryCR to identify which backups contain the target VM: -
Apply the VMBD CR by running the following command:
-
Verify that the discovery is complete by running the following command:
The
PHASEcolumn should displayCompleted. -
Create a
VirtualMachineFileRestoreCR with SSH access to restore files from the discovered backups:apiVersion: oadp.openshift.io/v1alpha1 kind: VirtualMachineFileRestore metadata: name: <vmfr_name> namespace: openshift-adp spec: backupsDiscoveryRef: <vmbd_name> fileAccess: ssh: {}The
ssh: {}configuration instructs the controller to autogenerate an SSH key pair and store it in a Kubernetes secret. The default SSH username isoadp. -
Apply the VMFR CR by running the following command:
-
Wait for the VMFR phase to complete:
The
PHASEcolumn should displayCompleted. -
Retrieve the SSH access information by running the following command:
The output includes the
clusterAccessURL and thecredentialsSecretRefcontaining the name and namespace of the auto generated SSH key secret. -
Retrieve the private key from the auto generated secret and save it to a file:
$ oc get secret <secret_name> -n <secret_namespace> -o jsonpath='{.data.privateKey}' | base64 -d > id-rsaReplace
<secret_name>and<secret_namespace>with the values from thestatus.fileServingInfo.ssh.credentialsSecretReffield. -
Copy the private key to the VM so that you can use it for
scpfrom within the VM: -
Update the file permissions on the private key inside the VM:
-
Get the name of the file server service created in the VMFR namespace:
Replace
<created_namespace>with the value from thestatus.createdNamespacefield of the VMFR CR. -
Restore the file by using
scpfrom within the VM. The remote path format is/restores/<date>/<backup_name>/<vm_name>/<path_to_file>:$ virtctl ssh <vm_user>@vmi/<vm_name> \ -n <vm_namespace> \ --identity-file=$HOME/.ssh/<vm_key_name> \ --local-ssh-opts="-o StrictHostKeyChecking=no" \ -c "scp -P 2222 \ -i /home/<vm_user>/id-rsa \ -o StrictHostKeyChecking=no \ -o UserKnownHostsFile=/dev/null \ oadp@<fileserver_svc>.<created_namespace>.svc.cluster.local:<remote_path> \ /tmp/restored.txt"where:
<fileserver_svc>- Specifies the name of the file server service you retrieved in an earlier step.
<created_namespace>- Specifies the namespace from the
status.createdNamespacefield. <remote_path>- Specifies the path to the file in the format
/restores/<date>/<backup_name>/<vm_name>/<path_to_file>. For example,"/restores/2026-02-10/test-backup/fedora-vm-test/home/fedora/test-vmfr-file.txt"
-
Verify that the restored file is intact by comparing MD5 checksums:
$ virtctl ssh <vm_user>@vmi/<vm_name> \
  -n <vm_namespace> \
  --identity-file=$HOME/.ssh/<vm_key_name> \
  --local-ssh-opts="-o StrictHostKeyChecking=no" \
  -c "echo '===MD5 Checksums===' && md5sum /home/fedora/test-vmfr-file.txt /tmp/restored.txt"
The checksums of the original and restored files should match. You should see an output as shown in the following example:
-
After you have recovered the files, delete the VMFR CR to clean up resources:
Additional resources